About UICollectionView in IOS

UICollectionView, Manages an ordered collection of data item and present them using customizable layouts.

UICollectionView is same as the UITableView. UITableView manages a collection of data or information and display then on the screen in a single column layout whereas UICollectionView offers developers flexibility to present item using customize layout.

UICollectionView has three components:-

  1. Cell:

It is an instance of UICollectionViewCell . It represent a single item in the data collection.

  1. Supplementary views:

It is optional and usually used to implement the header or footer view of the sections.

  1. Decoration views:

It is another type of supplementary view but for decoration purpose only. It is not related to data collection. We create decoration view to enhance the visual appearance of the CollectionView.

Step 1:

Open the Excode and select the Single View Application.

UI Collection View

Step 2:

Create project with “ExCollectionView” name.

ExCollectionView

Step 3:

Open the StoryBoard and there is a ViewController and drag the CollectionVIew inside the ViewController .

And set the Add New Constraints.

UIViewController1

Step 4:

Select now the cell inside the UIViewController and add the UIImage in the UICollectionView cell and also set the UIImage constraints.

ViewController.swift

UICollectionView2

And open the ViewController.swift and add the extension of  UICollectionViewDataSource,UICollectionViewDelegatein the ViewCollection.swift.

And these three method in the ViewController.swift:

func numberOfSections(in collectionView: UICollectionView) -> Int {

        code

    }

    func collectionView(_ collectionView: UICollectionView, numberOfItemsInSection section: Int) -> Int {

        code

    }

    func collectionView(_ collectionView: UICollectionView, cellForItemAt indexPath: IndexPath) ->      UICollectionViewCell {

        code

    }

UICollectionViewCel

After that select the UICollectionViewCell and set the name of the reuseIdentifier = “MyCollectionViewCell”

Using Assistant Editor, add an IBOutlet to CollectionView in ViewController.swift

@IBOutlet weak var collectionView: UICollectionView!

Create a new Cocoa Touch Class file (File > New > File… > iOS > Cocoa Touch Class). Name it MyCollectionViewCell. This class will hold the outlets for the views that you add to your cell in the storyboard.

ViewController

And open the ViewController.swift and add this code in the numberOfItemInSection in collectionview:

return

And go to the main story board and select the UIImage and set the image in the UIImage.

viewcontroller1

And also add one method in the viewcontroller.swift:

  func collectionView(_ collectionView: UICollectionView, layout collectionViewLayout:    UICollectionViewLayout, sizeForItemAt indexPath: IndexPath) -> CGSize {

        return (indexPath.section == 0) ? CGSize(width: collectionView.bounds.size.width, height: 200) : CGSize(width: collectionView.bounds.size.width/2 – 2, height: 170)

    }

And after the execude your code

UIImageView

It should be look like this. If you want to add multi image in the UIImageView then you use the array and pass the image in the array and cell in the cellForRowAtIndexPath method.

Also Read- About Intents in Android

Play Audio Video With AVFoundation in iOS Swift 3.0

AVFoundation is a framework in iOS that lets you performs a video play, create, edit, or reencode media files.  AVFoundation framework that you can create play Audio and Video visual media play in swift iOS.

AVFoundatiin allow you to work on detail level with time based audiovisual data with this framework in iOS swift , you can create, edit ,analyze and re-encoded data media files in swift application , it llok like pretty basic feature set. However, with this AVFoundation framework you can do some usual things, like capture a stream   and   in real time, manipulate and play back the same capture media.

Getting Start:-

Let’s now start an your Application design;

  1. Open your xcode
  2. Create a new xcode project
  3. Chose a single View Application then
  4. Click on next button then,
  5. Give the product name as you like then
  6. Click again next button then,
  7. Save in your directory and click on the create button
  8. Now ready your empty project then,
  9. Select you device that you want run your project

AVFoundation

Now click on the this you seen iphone 7 plus then select your simulator device you want run your project application seen like this

AVFoundation1

Now goto the project navigator and select the main.Storyboard from the project navigator

  • Now select your View Controller and goto the editor menu select the navigation controller you will see that add a navigation controller in your main.stroyboard
  • Then now select the navigation controller you will seen that your navigation controller automatically make a initial view controller
  • Let’s come on the design your view controller select the object library and search a UIButton then drag  a four uibutton  like this

AVFoundation2

Now drag four UIButon in the view controller you can seen

AVFoundation3

Now come on the change the text name of our button in the view controller we have two option change the name of the view the button

  1. Select the button and double your button text will come on edit mode.
  2. If you have second one option select the button and goto the attribute inspector change the text name of your button

AVFoundation5

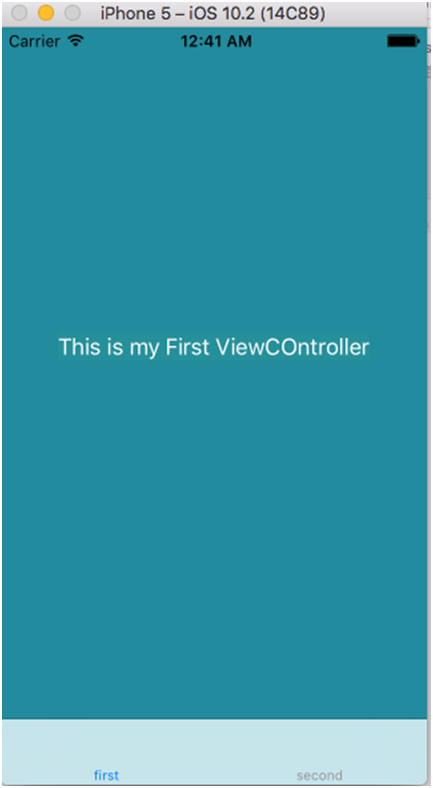
You see on the scren shot text name button change with AudioPlayer

  • Now ready your design for the click button paly the audio video and repeat the song and stop the song

AVFoundation6

  • Now goto the project navigator select the view controller


import AVFoundation

//MARK:- add this line below the import uikit

//Mark:- now make function to call audioplayer

func playAudio()

    {

// get random number for sound from the array

let intRandomNum = Int(arc4random_uniform(UInt32(arrAudio.count)))

// set URL of the sound

let soundURL = URL(fileURLWithPath: Bundle.main.path(forResource: arrAudio[intRandomNum], ofType: “wav”)!)

do

  {

   audioPlayer = try AVAudioPlayer(contentsOf: soundURL as URL)

   audioPlayer.delegate = self

// check if audioPlayer is prepared to play audio

if (audioPlayer.prepareToPlay()){

      audioPlayer.play()

            }

        }

        catch(let error)

        {

            debugPrint(error.localizedDescription)

        }

    }


  • Now make object for audioPlayer with AVAudioPlayer() like this:


var audioPlayer = AVAudioPlayer()

// Mark:- now add delegate method

class ViewController: UIViewController, UIImagePickerControllerDelegate, UINavigationControllerDelegate, AVAudioPlayerDelegate

{

// Mark now make to function for stop Audio


func stopAudio()

    {

        audioPlayer.stop()

        btnPlayAudioRepeatedly.isEnabled = true

        btnStopAudio.isEnabled = false

        playAudioRepeatedly = false

    }

 // mark function for get video from the iphone and directory

func getVideos()

    {

    let imagePickerController = UIImagePickerController()

imagePickerController.sourceType = .savedPhotosAlbum

imagePickerController.mediaTypes = [kUTTypeMovie as String]

imagePickerController.delegate = self

self.present(imagePickerController, animated: true, completion: nil)

    }

}


// Now created an object for Boolean value


var playAudioRepeatedly = true


// mark:- create array for playAudio data from your mobile and simulator

let arrAudio: [String] = [“chime_bell_ding”, “music_marimba_chord”, “pop_drip”]

//now make two @iboutlet weak var those create a memory for outlet:-

@IBOutlet weak var btnPlayAudioRepeatedly: UIButton!

@IBOutlet weak var btnStopAudio: UIButton!

//MARK: – AVAudioPlayerDelegate Methods

func audioPlayerDidFinishPlaying(_ player: AVAudioPlayer, successfully flag: Bool)

    {

        if (playAudioRepeatedly)

        {

            audioPlayer.play()

        }

    }

  • Now goto the object library and drag an AVKItPlayer View Controller

AVFoundation0

Now goto the project navigator and select the main project directory click on right open a list select the new file like this

Now create a new swift class that class will be cocoa touch class like this and click on the next button and give the class name VideoPlayerViewController and subclass should be AVPlayerViewController like this

AVFoundation02

After click next button open new window like seen this

AVFoundation03

Now create a new swift class with name will be VideoPlayerViewController import with these two libraries

import AVKit

import AVFoundation

//Mark: – now add a notification function for reachEndnotificationHandler

func playerDidReachEndNotificationHandler(notification: Notification)

    {

        print(“playerDidReachEndNotification”)

    }

//Mark: – this function use for load video

    func loadVideo(){

        videoPlayer = AVPlayer(url: videoURL)

        let playerVc = AVPlayerViewController()

        playerVc.player = videoPlayer

        NotificationCenter.default.addObserver(self, selector: #selector(playerDidReachEndNotificationHandler(notification:)), name: Notification.Name.AVPlayerItemDidPlayToEndTime, object: videoPlayer.currentItem)

        self.present(playerVc, animated: true)

        {

            playerVc.player?.play()

        }

    }

now do a thing that goto the click on main.storyboard select the AVKit player view controller and select the identity inspector give the class name VideoPlayerViewController and copy this class name paste the storyboard id box and Check the use storyboarb id This will work for the identifier

Now once again goto the view controller and create a uiimageaPickerControllerDelegate method

// MARK: – UIImagePickerControllerDelegate Methods

 func imagePickerController(picker: UIImagePickerController, didFinishPickingMediaWithInfo info: [String : AnyObject]){

self.dismiss(animated: true, completion: nil)

let videoPlayerViewController = self.storyboard!.instantiateViewController(withIdentifier: “VideoPlayerViewController”) as! VideoPlayerViewController videoPlayerViewController.videoURL = info[UIImagePickerControllerMediaURL] as? URL as URL!

self.navigationController!.pushViewController(videoPlayerViewController, animated: true)

    }

now last one thing add @ibaction for all button in the view controller

make an action for every button  and add functionality

//MARK: – Action Methods

 @IBAction func btnPlayAudioTapped(sender: AnyObject)

    {

        playAudio()

    }

@IBAction func btnPlayVideoTapped(sender: AnyObject)

    {

        getVideos()

    }

@IBAction func btnPlayAudioRepeatedlyTapped(sender: AnyObject)

    {

        btnPlayAudioRepeatedly.isEnabled = false

        btnStopAudio.isEnabled = true

        playAudioRepeatedly = false

        playAudio()

    }

@IBAction func btnStopAudioTapped(sender: AnyObject)

    {

        stopAudio()

}

Now one important thing add a string library into a plist  because if not add this stirng  library application give the run time error

Select the info plist in the project navigator click on the add button  like this

and tap on the pulse button select the srting library this

And now last and final step connect all @iboutlet, @ibAction with view controller

  • Now run your project it will run successfully

AVFoundation08

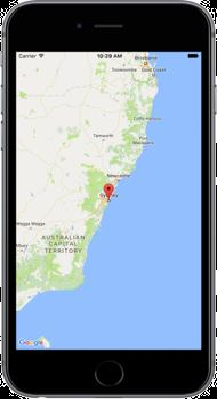
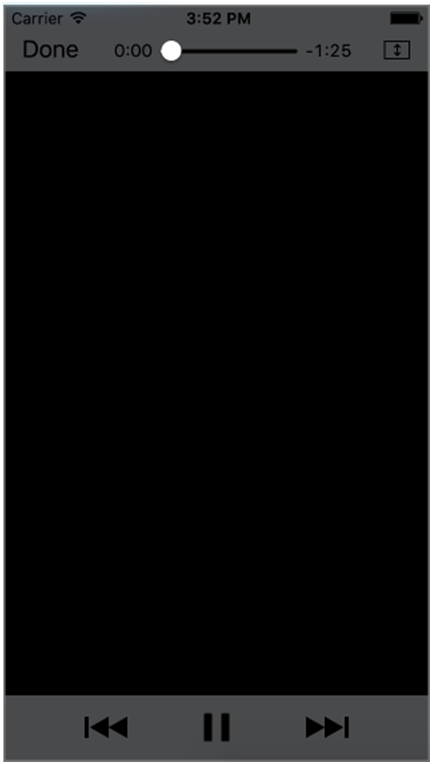
Now click on the ok button your simulator video will be show in the list and select those you chose and play the video like this after click on the ok button

AVFoundation09

Select video click that your video play successfully

AVFoundation00

Also Read- About UICollectionView in IOS

If you are, looking to Develop and design for your project then feel free to contact us at any time

Call Us- +91 9910781148, +1 8033353593
Email: company@tecorb.com
Skype- tecorb
“We maintain transparency with our customers. Our values and business ethics has given us repeated customers. We tend are proud to be a reliable outsourcing partner for many clients across the World.”


Tab Bar Controller In Swift IOS

OverView:- Tab Bar Controller

The Tab Bar interface is helpful in situation where you want  to provide different perspective on the same set of data or in situation, where you want to or in situation where we want to provides your application long functional lines. The key component of a tab bar interface is the present of tab bar view along the bottom of the screen. This view is used to initiate the navigation bar b/w your application different modes and can also provide the information about the state of each mode

The manager for a tab bar interfaces is a tab bar controller objects. The tab bar controller creates and manages the tab bar view and also manages the view controller that provided the content view for each mode. Every contents of view controller is design as the view controller for one of the tabs in the tab bar view. When a tab is pressed by the user, the tab bar controller object select the tab and display the view associat with correspond content view controller.

Tab bar controller has its own container view, which encompass all of the other views, including the tab bar view. The custom is provided by the view controller of the selected tab.

Getting Start:-

Open a xcode  and create a new project. Use the Single View Application as starting point :-

  1. Create Single View Application and Click on the Next button
  2. Give the Product name and click  on the next button
  3. After that click on the create button

After Xcode  has created the project

  • The new project consist of two classes AppDelegate , ViewController and main.storyboard file.
  • Click Main.Storyboard in the project navigator to open it in the Interface Builder editor.
  • Select the ViewController and goto Editor click on the editor

untitled

  • Then goto the Embed in And Seclect the tab bar Controller
  • The you will see that in your project embedded a tab bar controller like this

ios-apps-development-companyIn your project of the Main.Storyboard file you will see that add a new tabbar controller and your main .Storyboard file look  like this your project inter face builder

iphone-application-development

if you want embedded  more ViewController with this tab bar controller then you select the ViewController from the object library and Drag the ViewController in the interface builder

  • Now you see that in your project have two  ViewController in the Main.StoryBoard
  • If you want join second ViewController with the tab bar controller then do this  Control + Drag on the secondViewController then you see a pop view like this

iphone-apps-development-company

Then you select the view controller from this view

Now then you see after complete this job in your project  a tab bar controller connect with your secondViewController.

tab-bar-controller

  • Now you can run your project but how to decide that , which View controller is first view Controller and which Second View Controller
  • Now you drag uilabel drag from the object library set in the first and second View Controller
  • You can write on this label as like for First View Controller “ This is my fist View Controller” and same as for second View Controller name “This is my second View Controller”.
  • And set label color White And you want change the view controller background color
  • then select the view Controller
  • and go to attribute inspector select Backgroung color
  • set the background color
  • Now, run your project

viewcontroller-bar

Now click on the simulator second item you see  the second view Controller .

second-view-controller

Also Read- Cron Job With Sidekiq

If you are, looking to Develop and design for your project then feel free to contact us at any time

Call Us- +91 9910781148, +1 8033353593
Email: company@tecorb.com
Skype- tecorb
“We maintain transparency with our customers. Our values and business ethics has given us repeated customers. We tend are proud to be a reliable outsourcing partner for many clients across the World.”

Google Map Integration in Swift IOS

OverView:-

Google Map Integration in iOS and SDK, Google Maps is a web mapping service developed by Google. It offer satellite imagery, street maps 360 degree panoramic views of streets, real- time traffic condition, and route planning for travelling by foot, car, cycle, or public transportation

Working with maps in consists of an entire programming as there are tons of things that a developer can do with them. From just presenting a location on a map to drawing a journey’s route with intermediate positions, or even exploiting a map’s possibilities in totally different approach, dealing with all these undoubtly may be a great experience that leads to superb results.

Getting Start

Step 1:- Get the latest version of Xcode

Step 2:- Install the SDK

Create a Podfile for the Google Maps SDK for IOS and use it to install the API and its dependencies:

  1. If you do not have an Xcode project yet, create one now and save it to your local machine. (If you are new to iOS development, create a Single View Application.)
  1. Create a file named Podfile in your project directory. This file defines your project’s dependencies.
  1. Edit the Podfile and add your dependencies. which includes the dependencies you need for the Google Maps SDK for iOS and Places API for iOS (optional):
  1. Add this pod in Podfile in your application
  2.            do

                       pod ‘GoogleMaps’

                       pod ‘GooglePlaces’

                    end

 6. Save the podfile

7.Open a terminal and go to the directory containing the Podfil

 8. Cd <path-to- project>

 9. Run pod install command

     Pod install

10. Close Xcode, and then open (double-click) your project’s .xcworkspace file to launch Xcode. From this time onwards, you must use the .xcworkspace file to open the project.

Step 3:- Get an API key

1.Go to the Google API Console.

2.Create or select a project.

3.Click Continue to enable the Google Maps SDK for iOS.

4. On the Credentials page, get an API key.

Note: If you have a key with iOS restrictions, you can use that key. You can use the same key with any of your iOS apps within the same project.

5. From the dialog displaying the API key, select Restrict key to set an iOS restriction on the API key.

6.In the Restrictions section, select iOS applications, then enter your app’s bundle identifier. For example: example.hellomap.

you get the bundle identifier from your project go to project then click on the project name folder then select project-> target-> general-> identity->bundle identifier -> copy your that bundle identifier then paste that identifier those restriction section

  1. Click Save.

Your new iOS-restricted API key appears in the list of API keys for your project. An API key is a string of characters, something like this:

AIzaSyBdVl-cTICSwYKrZ95SuvNw7dbMuDt1KG0

Step 4:- Add API key in your application

Add your API key to your AppDelegate.swift

  1. Import GoogleMaps
  2. Add the following to your application(_:didFinishLaunchingWithOptions:) method,

replacing YOUR_API_KEY with your API key:

GMSServices.provideAPIKey(“YOUR_API_KEY ”)

  1. if you are also using the Places API

GMSPlacesClient.provideAPIKey(“YOUR_API_KEY ”)

 Step 5:- ADD Map

Now, add or update a few methods inside your app’s default ViewController to create and initialize an instance of GMSMapView.

import UIKIT

import GoogleMaps

class GoogleMapViewController: UIViewController{

override fun loadView(){

//Mark:- Create a GMSCameraPosition there tells the map to displaying the Map

// coordinate set you want suppose Coordinate latitude -33.86, longitude – 151.20 at zoom level 10.

let camera = GMsCameraPosition.Camera(withLatitude: -33.86, longitude: 151.20, zoom: 10.0)

let mapView = GMSMapView.map(withFrame: CGRect.Zero, camera: camera)

// Mark:- Create a Marker in the Centre of the map you are designing

let marker = GMSMarker()

marker.position = CLLocationCoordinate2D(latitude: -33.86, longitude: 151.20)

marker.tittle = “Sydney”

marker.snippet = “Australia”

marker.map = mapView

  }

}

Step 6:- Declare the URL scheme used by API

Application must be declare the URL schemes that they intend to open, by specifying the schemes in the app’s Info.plist file.

To declare the URL schemes used by the Google Maps SDK for iOS add the following lines to your Info.plist

<key>LSApplicationQueriesSchemes</key>

<array>

<string>googlechromes</string>

<string>comgooglemaps</string>

</array>

Step 7:- Run your project

untitled

Also Read-Swift Tips for Those Getting Started

If you are, looking to Develop and design for your project then feel free to contact us at any time

Call Us- +91 9910781148, +1 8033353593
Email: company@tecorb.com
Skype- tecorb
“We maintain transparency with our customers. Our values and business ethics has given us repeated customers. We tend are proud to be a reliable outsourcing partner for many clients across the World.”